> ## Documentation Index
> Fetch the complete documentation index at: https://herd.laravel.com/docs/llms.txt
> Use this file to discover all available pages before exploring further.
# Migrating from XAMPP
# How to migrate from XAMPP to Herd
If you're coming from XAMPP and want to switch to Herd, this guide will help you migrate your development environment smoothly. Herd provides a more streamlined development experience with automatic domain handling, multiple PHP versions, and integrated debugging tools.
## Main Differences
Before diving into the migration process, here are the key differences between XAMPP and Herd:
* Herd is optimized for Laravel development (and support all major frameworks)
* Herd uses `.test` domains instead of localhost URLs (e.g., `mysite.test` instead of `localhost/mysite`)
* Herd provides automatic domain handling via the HerdHelper service instead of manual virtual hosts
* Herd manages PHP versions per site, allowing you to run different versions simultaneously
* Herd provides built-in debugging tools and service management with [Herd Pro](https://herd.laravel.com/checkout)
## Migration Steps
### 1. Install Herd
First, download and install Herd from the [official website](https://herd.laravel.com/download/windows). During installation, Herd will:
* Install the HerdHelper service for domain management
* Set up PHP, nginx, and other required tools
* Create a parked directory at `%USERPROFILE%\Herd`
### 2. Migrate Your Sites
Move your site files from the XAMPP `htdocs` directory to your new Herd directory:
```powershell theme={null}
# Create directories if they don't exist
mkdir %USERPROFILE%\Herd
# Copy your sites
xcopy C:\xampp\htdocs\your-site %USERPROFILE%\Herd\your-site\ /E /H /C /I
```
Replace `your-site` with the actual name of your project directory.
Herd automatically makes sites available via `http://directory-name.test`. For example, if your site is in `%USERPROFILE%\Herd\my-wordpress`, it will be available at `http://my-wordpress.test`.
If you need additional domains or want to point multiple domains to a single site, you can use the `herd link` command:
```powershell theme={null}
cd %USERPROFILE%\Herd\your-site
herd link additional-domain
```
### 3. Migrate Databases
Before shutting down XAMPP, export your databases via phpMyAdmin or the MySQL command line:
```sql theme={null}
mysqldump -u root your_database > your_database.sql
```
If you're using [Herd Pro](https://herd.laravel.com/checkout), you can install MySQL directly from the Services tab in the settings:
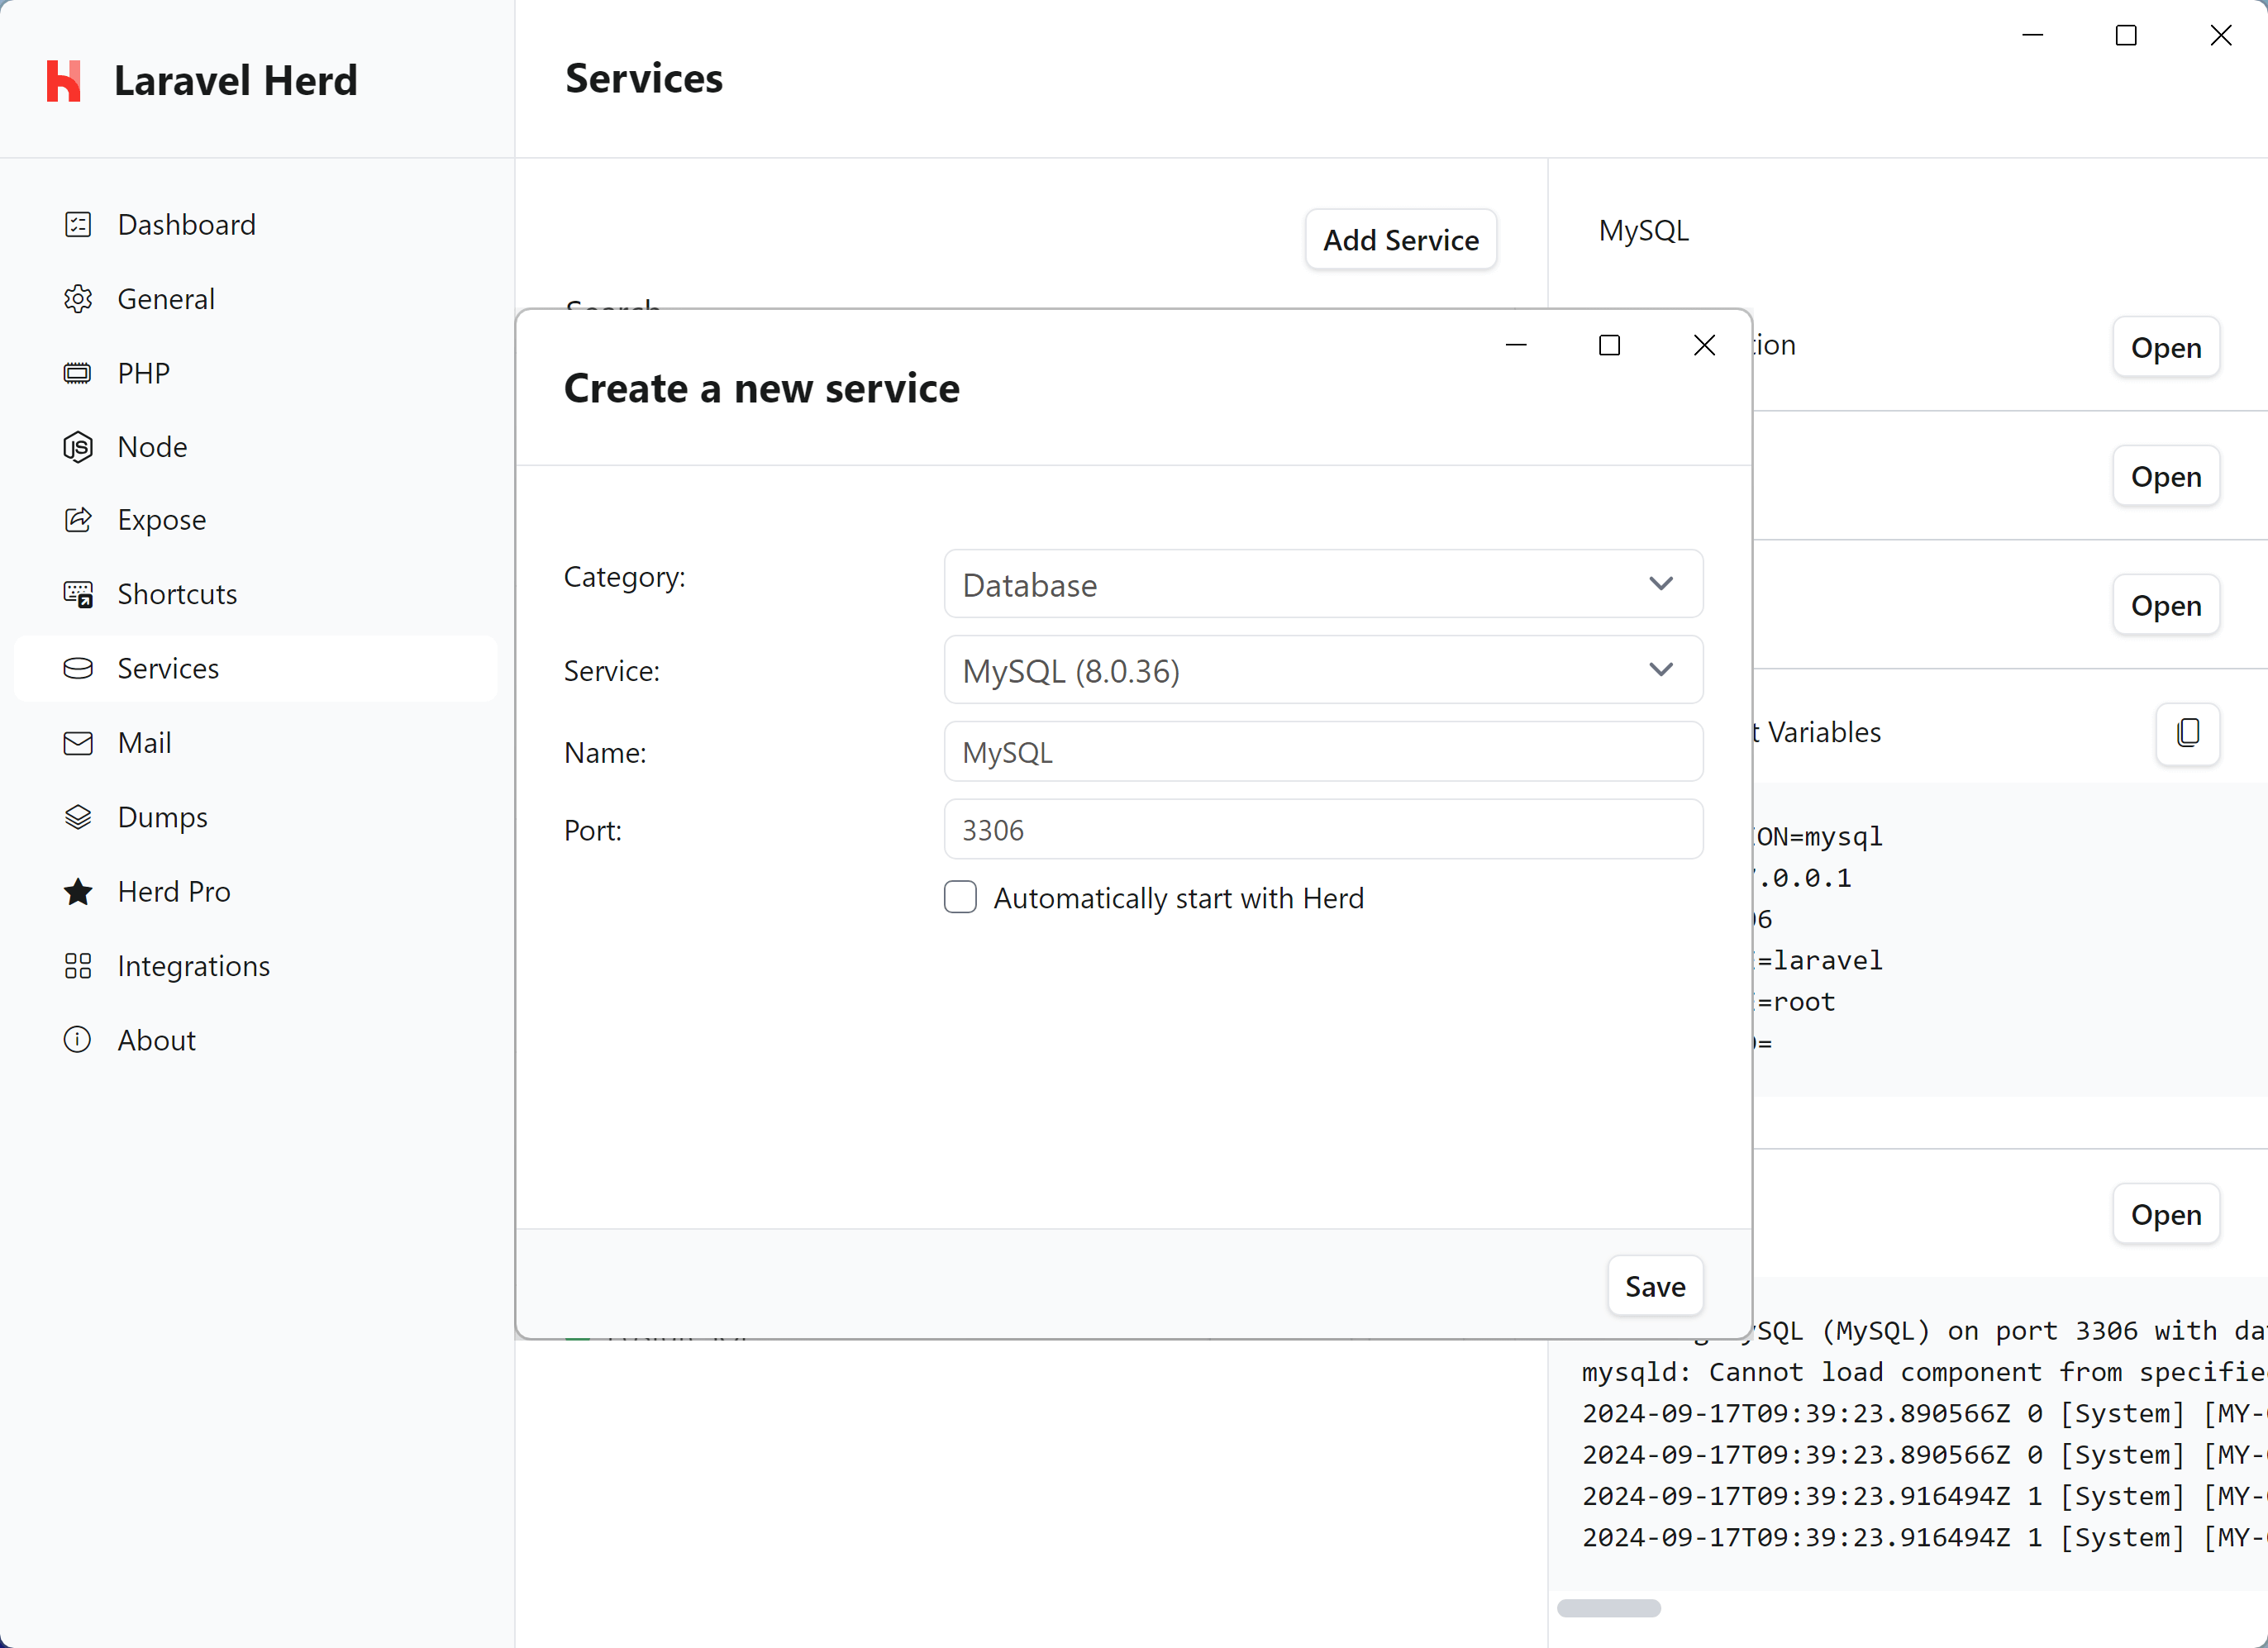 Alternatively, you can install MySQL separately or use tools like [DBngin](https://dbngin.com).
After setting up your database service, import your databases via the command line:
```sql theme={null}
mysql -u root -h 127.0.0.1 -P 3306 your_database < your_database.sql
```
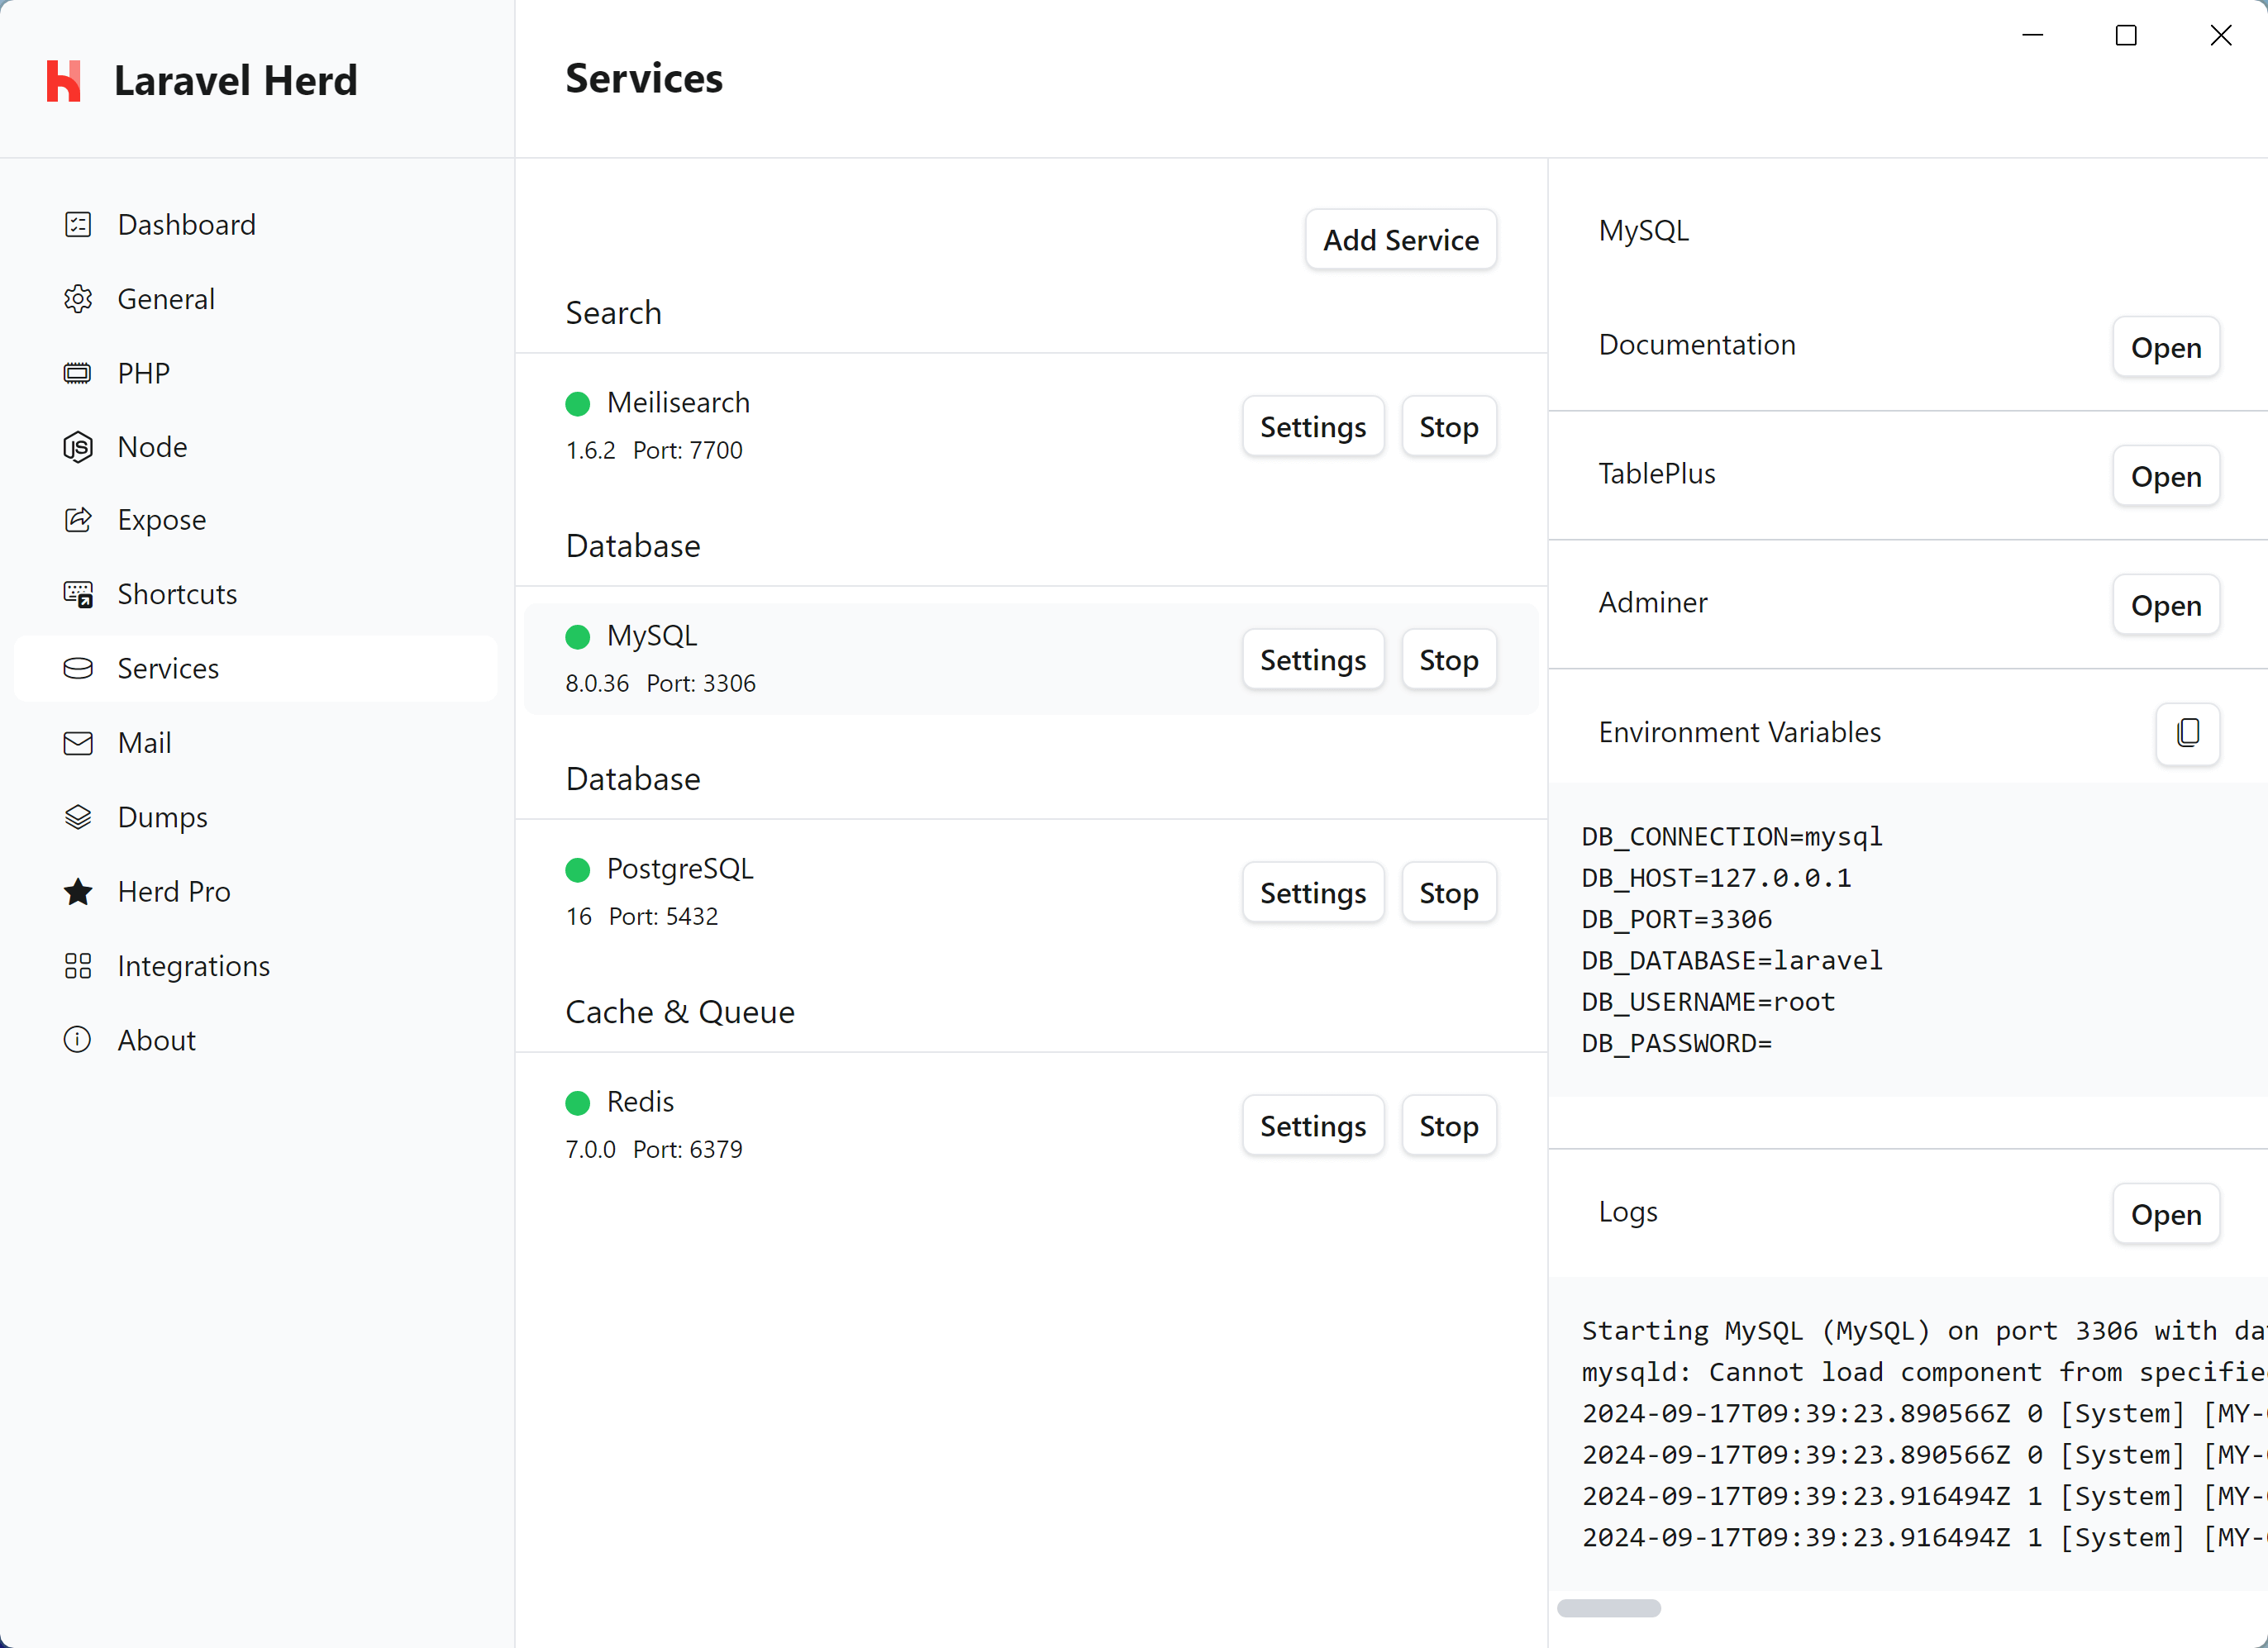
Or use TablePlus/AdminerEvo which are accessible directly from Herd's service configuration:
Alternatively, you can install MySQL separately or use tools like [DBngin](https://dbngin.com).
After setting up your database service, import your databases via the command line:
```sql theme={null}
mysql -u root -h 127.0.0.1 -P 3306 your_database < your_database.sql
```
Or use TablePlus/AdminerEvo which are accessible directly from Herd's service configuration:
 ### 4. Update Configuration Files
Update your site's configuration files to match Herd's setup:
```env .env theme={null}
DB_CONNECTION=mysql
DB_HOST=127.0.0.1
DB_PORT=3307 # Use your configured port
DB_DATABASE=your_database
DB_USERNAME=root
DB_PASSWORD=
```
```php wp-config.php theme={null}
define('DB_HOST', '127.0.0.1:3307'); // Use your configured port
define('DB_NAME', 'your_database');
define('DB_USER', 'root');
define('DB_PASSWORD', '');
```
### 5. Secure Your Sites
If your XAMPP sites used HTTPS, you can secure them in Herd using the `herd secure` command:
```powershell theme={null}
cd %USERPROFILE%\Herd\your-site
herd secure
```
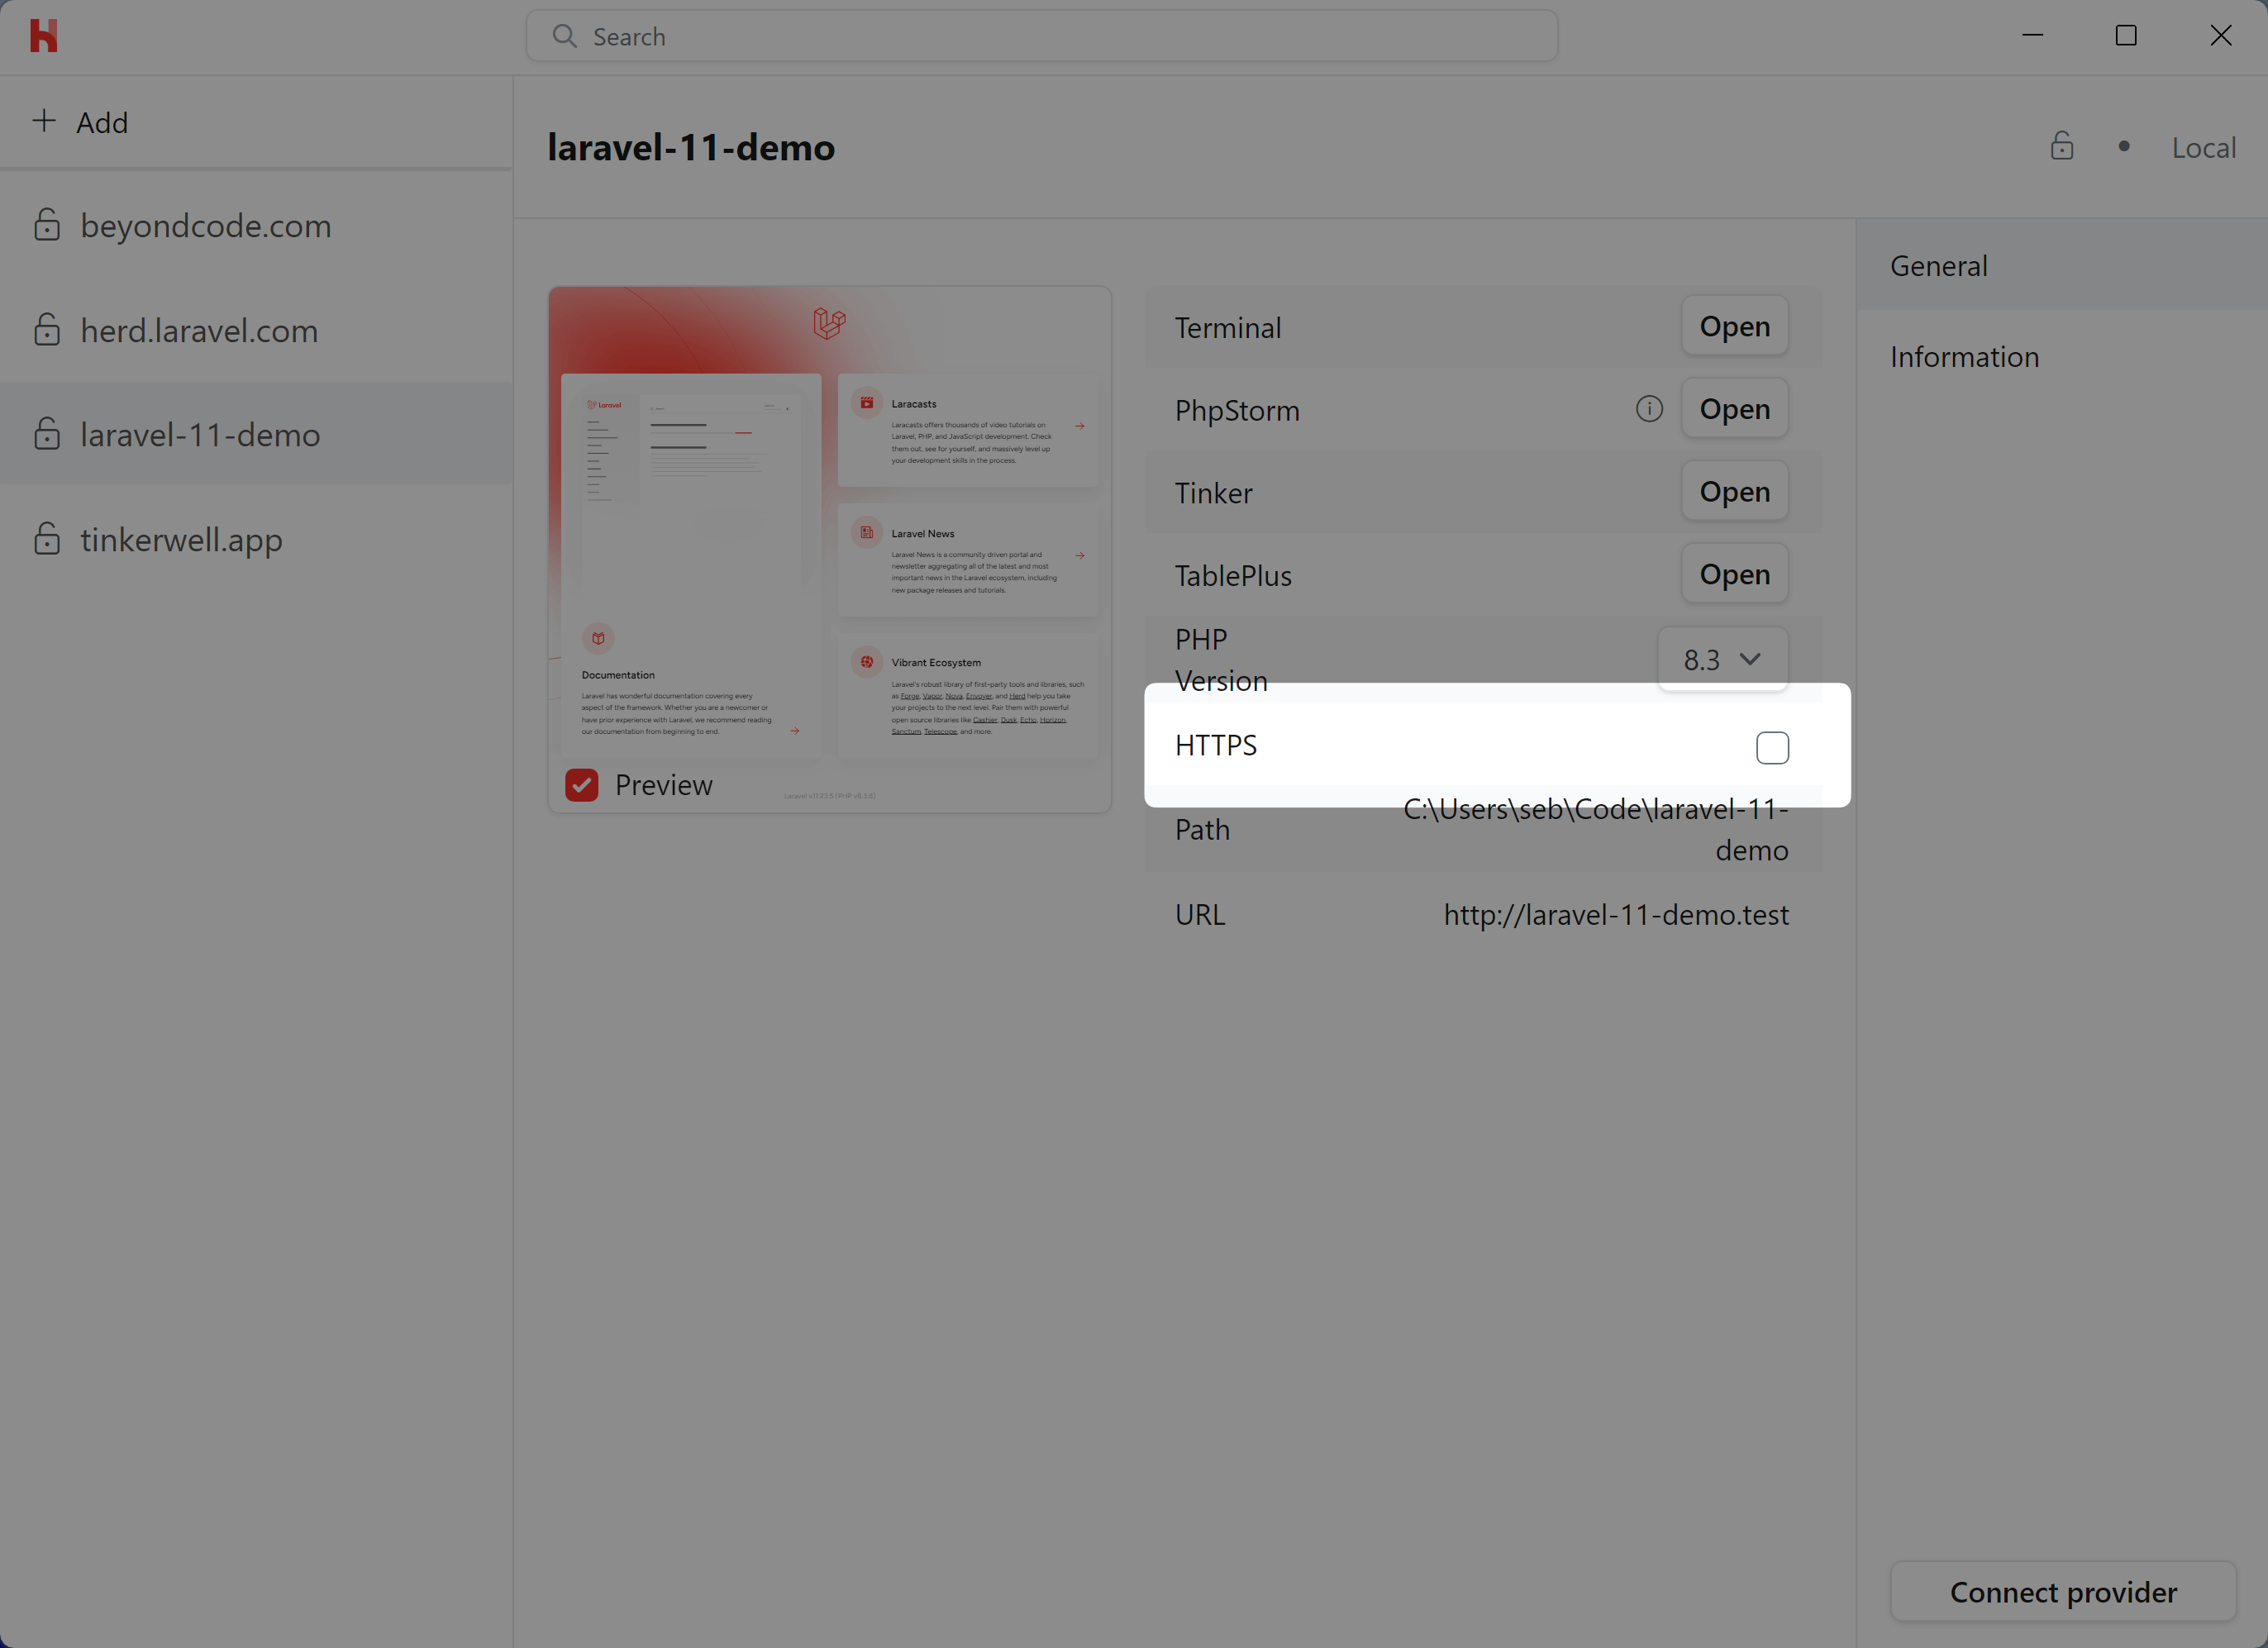
You can also toggle HTTPS in the [Site Manager](/windows/advanced-usage/managing-sites):
### 4. Update Configuration Files
Update your site's configuration files to match Herd's setup:
```env .env theme={null}
DB_CONNECTION=mysql
DB_HOST=127.0.0.1
DB_PORT=3307 # Use your configured port
DB_DATABASE=your_database
DB_USERNAME=root
DB_PASSWORD=
```
```php wp-config.php theme={null}
define('DB_HOST', '127.0.0.1:3307'); // Use your configured port
define('DB_NAME', 'your_database');
define('DB_USER', 'root');
define('DB_PASSWORD', '');
```
### 5. Secure Your Sites
If your XAMPP sites used HTTPS, you can secure them in Herd using the `herd secure` command:
```powershell theme={null}
cd %USERPROFILE%\Herd\your-site
herd secure
```
You can also toggle HTTPS in the [Site Manager](/windows/advanced-usage/managing-sites):
 ### 6. PHP Configuration
While XAMPP uses a global `php.ini` file, Herd allows you to:
* Use different PHP versions per site via [isolation](/windows/advanced-usage/php-versions#per-site-php-versions)
* Configure PHP settings via the GUI or by editing version-specific `php.ini` files
* Manage PHP extensions for each version independently
You can find your PHP configuration files at:
```
%USERPROFILE%\.config\herd\bin\\php.ini
```
### 7. Virtual Hosts Migration
If you used virtual hosts in XAMPP, you can achieve the same with Herd's linking feature:
```powershell theme={null}
cd %USERPROFILE%\Herd\your-site
herd link your-domain
```
This automatically:
* Updates your hosts file
* Configures nginx
* Makes the site available via `http://your-domain.test`
## Development Tools
Herd Pro provides several tools that improve upon XAMPP's development experience:
* [Mail Testing](/windows/herd-pro/mail) - Built-in mail catcher for testing emails
* [Log Viewer](/windows/herd-pro/logs) - Convenient log viewing and searching
* [Dumps](/windows/herd-pro/dumps) - Advanced debugging with request information
* [Xdebug](/windows/herd-pro/xdebug) - On-demand Xdebug activation
* [Service Management](/windows/herd-pro/services) - GUI for managing databases and other services
## Troubleshooting
If you encounter issues during migration:
* Check the [common issues](/windows/troubleshooting/common-issues) documentation
* Verify your [hosts file](/windows/troubleshooting/common-issues#dns-errors) is being updated
* Review the [logs](/windows/troubleshooting/common-issues#herd-debug-logs) for errors
* Ensure the [HerdHelper service](/windows/troubleshooting/common-issues#the-herdhelper-windows-service-isnt-working) is running
If you need to start fresh, you can follow the [uninstall guide](/windows/troubleshooting/uninstalling) to remove Herd completely and reinstall.
## After Migration
After successfully migrating to Herd, we recommend:
1. Uninstall XAMPP to avoid port conflicts
2. Remove old virtual host entries from your hosts file
3. Consider upgrading to [Herd Pro](https://herd.laravel.com/checkout) for additional development tools
4. Familiarize yourself with Herd's [CLI commands](/windows/advanced-usage/command-line)
### 6. PHP Configuration
While XAMPP uses a global `php.ini` file, Herd allows you to:
* Use different PHP versions per site via [isolation](/windows/advanced-usage/php-versions#per-site-php-versions)
* Configure PHP settings via the GUI or by editing version-specific `php.ini` files
* Manage PHP extensions for each version independently
You can find your PHP configuration files at:
```
%USERPROFILE%\.config\herd\bin\\php.ini
```
### 7. Virtual Hosts Migration
If you used virtual hosts in XAMPP, you can achieve the same with Herd's linking feature:
```powershell theme={null}
cd %USERPROFILE%\Herd\your-site
herd link your-domain
```
This automatically:
* Updates your hosts file
* Configures nginx
* Makes the site available via `http://your-domain.test`
## Development Tools
Herd Pro provides several tools that improve upon XAMPP's development experience:
* [Mail Testing](/windows/herd-pro/mail) - Built-in mail catcher for testing emails
* [Log Viewer](/windows/herd-pro/logs) - Convenient log viewing and searching
* [Dumps](/windows/herd-pro/dumps) - Advanced debugging with request information
* [Xdebug](/windows/herd-pro/xdebug) - On-demand Xdebug activation
* [Service Management](/windows/herd-pro/services) - GUI for managing databases and other services
## Troubleshooting
If you encounter issues during migration:
* Check the [common issues](/windows/troubleshooting/common-issues) documentation
* Verify your [hosts file](/windows/troubleshooting/common-issues#dns-errors) is being updated
* Review the [logs](/windows/troubleshooting/common-issues#herd-debug-logs) for errors
* Ensure the [HerdHelper service](/windows/troubleshooting/common-issues#the-herdhelper-windows-service-isnt-working) is running
If you need to start fresh, you can follow the [uninstall guide](/windows/troubleshooting/uninstalling) to remove Herd completely and reinstall.
## After Migration
After successfully migrating to Herd, we recommend:
1. Uninstall XAMPP to avoid port conflicts
2. Remove old virtual host entries from your hosts file
3. Consider upgrading to [Herd Pro](https://herd.laravel.com/checkout) for additional development tools
4. Familiarize yourself with Herd's [CLI commands](/windows/advanced-usage/command-line)